Understand Track
Admin Screen Controls
Track Admin has additional features that the administrators may use
to manage the user accounts.
Calendar
The dates may be entered manually or selected from a calendar.
Enter a date manually
Date must be in a Month/Date/Year format.
Select a date from a calendar
Click the Calendar icon
 to open the Calendar pop-up box.
The current month and year is displayed at the calendar header.
Click the month/year on the calendar header to open a pop-up menu,
displaying abbreviated months and years. The Today,
OK, and Cancel
buttons display at the bottom of the pop-up menu.
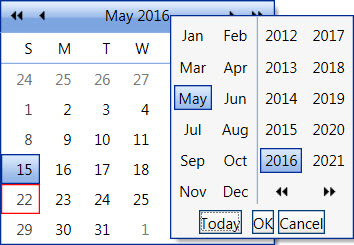
From the pop-up menu:
Select a month and/or a year to highlight them. Click the
OK button. The pop-up
menu closes and the selected month and/or year are displayed at
the Calendar pop-up box.
Click the Today
button to close the pop-up menu and return to the Calendar pop-up
box, displaying the current date in a red square.
Click the Cancel
button to close the pop-up menu and return to the Calendar pop-up
box without saving the changes.
From the Calendar pop-up box, click the Previous
Three Months icon  to jump backward three months.
Click the Previous Month
icon  to move backward a month.
Click the Next Month
icon  to move forward a month.
Click the Next Three Months
icon  to jump forward three months.
From the Calendar pop-up box, click a number to select a date.
If a selected date is on the current month, today's date is highlighted
in red.
Click anywhere on the background to close the Calendar pop-up
box.
Export to Excel
Locate the records to export to Excel.
Click the Export to Excel
icon  . The pop-up message
appears.
. The pop-up message
appears.
Select Open, Save,
or Cancel button accordingly.
Export to PDF
Locate the records to export to PDF.
Click the Export to PDF
icon  .
The pop-up message appears.
.
The pop-up message appears.
Select Open, Save,
or Cancel button accordingly.
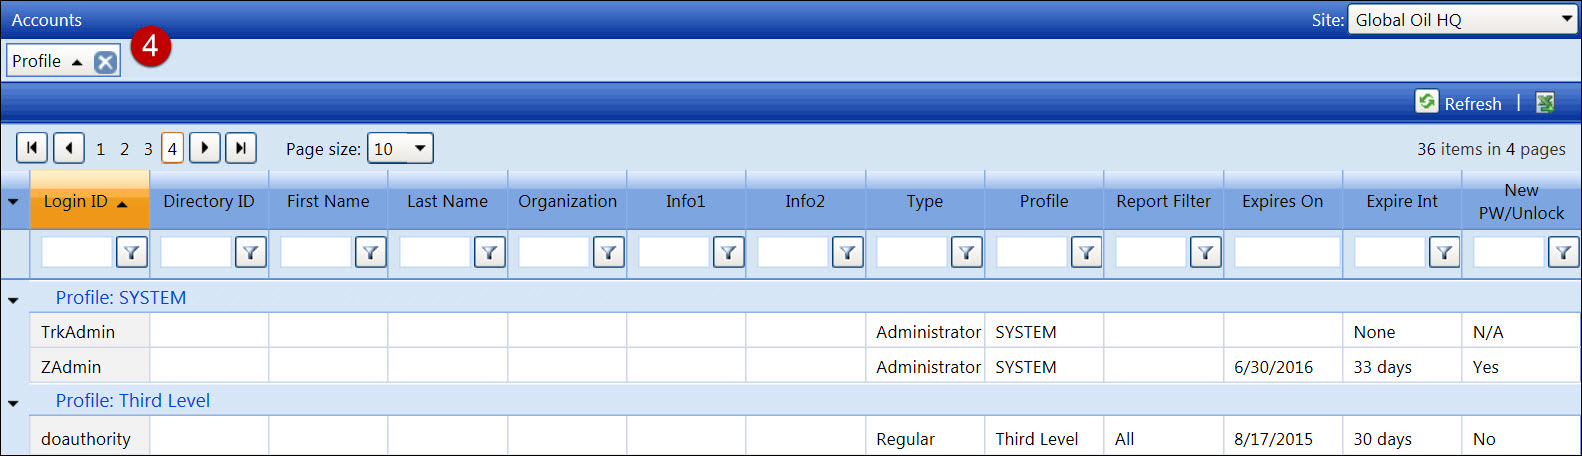
Filter option
Filter results to display records that meet the search options. Entries
in the text boxes are not case-sensitive.
Enter the information being searched into the appropriate text
box.
Click a Filter icon
 to display the filter pop-up menu.
Select a filter option to apply the selected filter option and
display the records according to the search options.
Repeat the steps to apply another search filter, or click the
No Filter option from the
filter pop-up menu to clear the text box, refresh the data, and display
all records.
Group items by column header
User may group records by one or more column headers.
In the grid area, press and hold a mouse pointer on a column
header.
Drag and drop it on to the area noted, "Drag a column header
and drop it here to group by that column." The screen refreshes,
and the records in the grid are grouped by a selected column header.
Repeat the steps to group records by another column header.
The Sort and Cancel icons display on the column header button.
Refresh a screen
There are two different methods to refresh the entire screen. Refreshing
the screen will clear the entries in text boxes that are on the screen.
Click the Refresh
icon in the URL or address bar to refresh the entire screen.
Alternatively, right-click anywhere on the screen to display
a pop-up menu.
Select the Refresh option
to refresh the entire screen.
Resize a column
Hover a mouse pointer over the line between the column headers
until a double arrow appears.
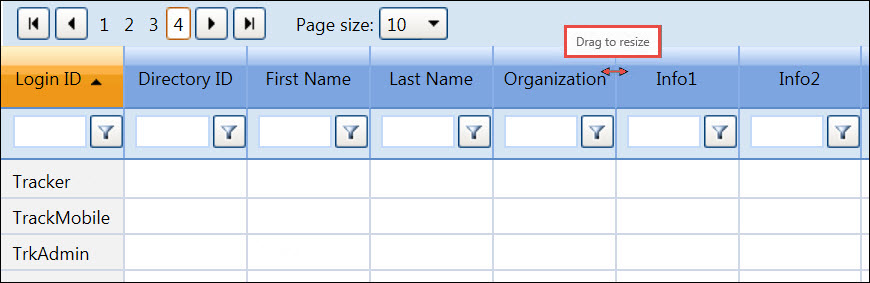
Press and hold the mouse then drag the line to the left or right
to resize the column.
Refresh data in the grid area
The Refresh icon is located on the top of the grid area. Click the Refresh icon  to refresh only the grid area, clearing the entries in the text boxes
or return to the defaults drop-down lists.
to refresh only the grid area, clearing the entries in the text boxes
or return to the defaults drop-down lists.
Site drop-down list

The Site drop-down list is located in the right corner of the screen.
Select a site from the Site drop-down
list to switch between the sites of the company setup.
Theme drop-down list

The Theme drop-down list is located on the menu bar. Select a theme
from the Theme drop-down list
to select a color scheme that applies to Track Admin screens. Even though
the icons' images and colors are different, their functionalities remain
the same.
View by Page icons and Page Size drop-down list

View by Page icons and the Page Size drop-down list are displayed above
the listing.
Click the First
Page icon  to display the records on the
first page.
to display the records on the
first page.
Click the Previous
Page icon  to display the records on the
previous page.
to display the records on the
previous page.
Click the Next
Page icon  to display the records on the
next page.
to display the records on the
next page.
Click the Last
Page icon  to display the records on the
last page.
to display the records on the
last page.
Click the page number to go directly
to the selected page.
The number of records and pages
are located at the top right corner of the grid. Select the 10, 20,
or 50 option from the Page Size drop-down list to display
the selected number of records per page.
 to sort the records in ascending
or descending order.
to sort the records in ascending
or descending order.  to ungroup the records.